DIY Bling Rhinestone Pen Kit
€ 6.50 · 4.7 (163) · En stock
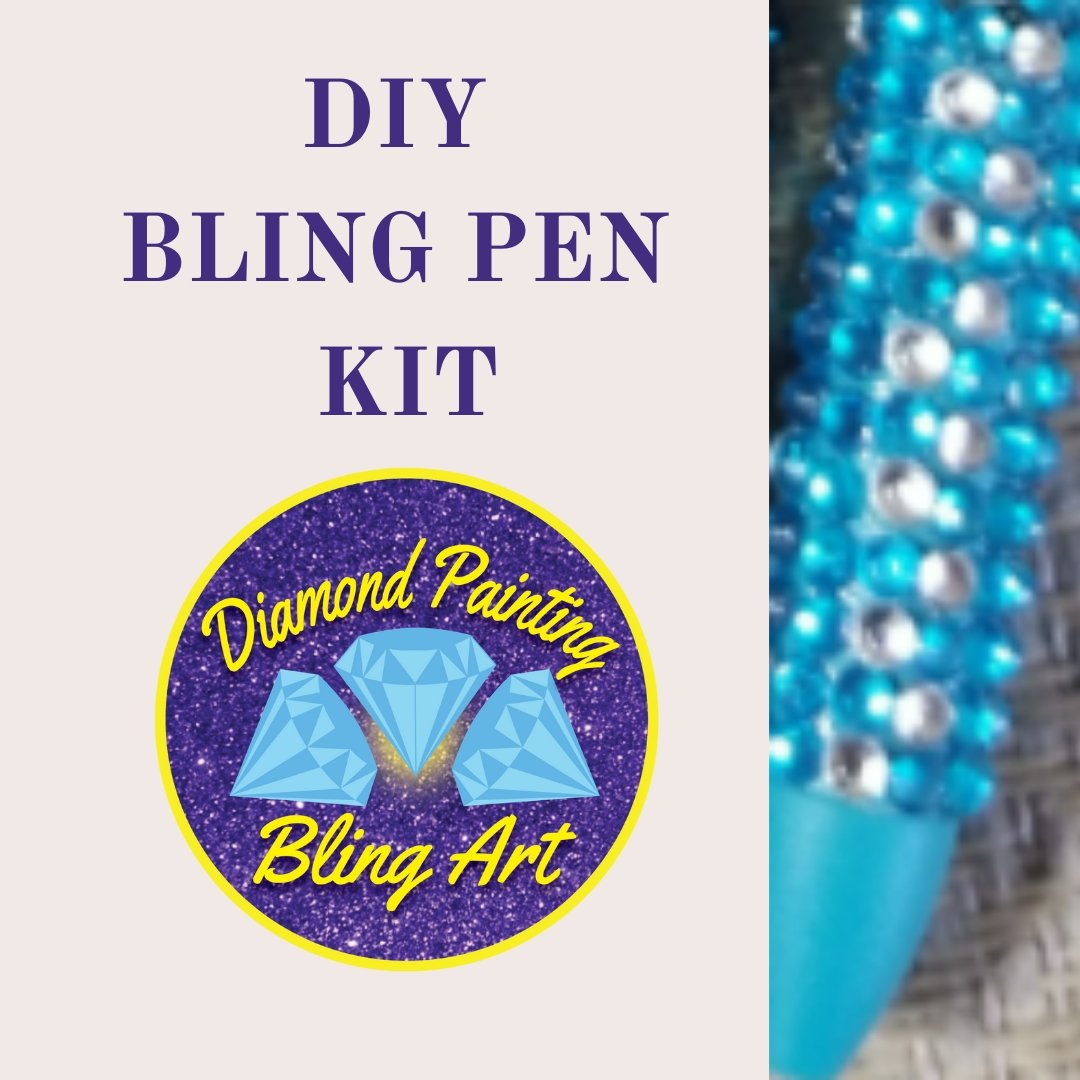
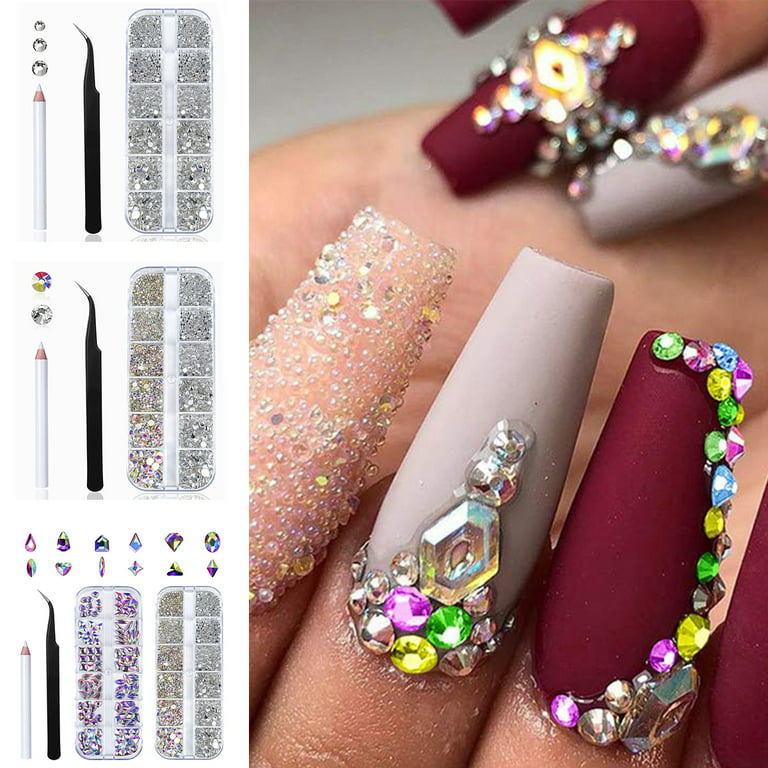
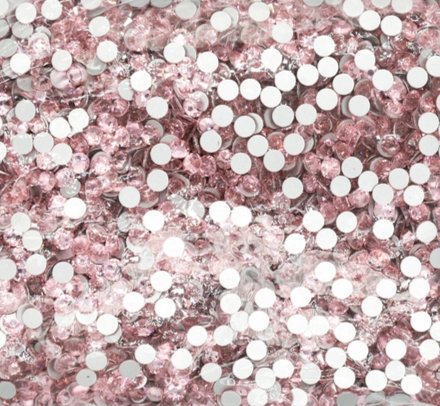
Try blinging your very own rhinestone jewel pen with this amazing starter kit.Bling Pen Kit Will Contain:InkJoy Gel Pen (color may vary)Rhinestones for ProjectRhinestone Tray Wax PencilSand paperAlcohol Wipe Disposable Applicator* Glue not included Steps to Bling your penDisassemble pen and keep parts in a safe placePaint barrel of pen to match color of rhinestone (optional)Use nail file and sand barrel of pen. (Remove clip, some do some don’t)Use alcohol wipe and wipe down surface, let air dryPour rhinestones in sorting trayApply a small amount of glue in a short line. Start at the top of the pen. (gemtac, Liquid fusion, B7000 all options not included in kit)Place rhinestones around pen evenly spaced LET DRY before moving to next row. This is the foundation row so be sure it is straightContinue with next row until you have filled entire pen.Let Cure for 7 daysRe-assemble pen and enjoy your new Bling Pen! Diamond Painting Bling Art
A Premium Diamond Painting Experience, Best Selections including exclusive designs and licensed artwork. FAST shipping from Las Vegas, Nevada. DIY Arts & Crafts! New Arrivals weekly with something for everyone.
<p><span data-mce-fragment="1">Try blinging your very own rhinestone jewel pen with this amazing starter kit.</span></p>
<p>Bling Pen Kit Will Contain:</p>
<p style="margin: 0in; margin-bottom: .0001pt;"><span style="font-size: 10.5pt; font-family: 'Segoe UI',sans-serif; color: #212b36;">InkJoy Gel Pen (color may vary)</span></p>
<p style="margin: 0in; margin-bottom: .0001pt; font-variant-ligatures: normal; font-variant-caps: normal; orphans: 2; text-align: start; widows: 2; -webkit-text-stroke-width: 0px; text-decoration-thickness: initial; text-decoration-style: initial; text-decoration-color: initial; word-spacing: 0px;"><span data-mce-style="font-size: 10.5pt; font-family: 'Segoe UI',sans-serif; color: #212b36;">Rhinestones for Project</span></p>
<p style="margin: 0in; margin-bottom: .0001pt; font-variant-ligatures: normal; font-variant-caps: normal; orphans: 2; text-align: start; widows: 2; -webkit-text-stroke-width: 0px; text-decoration-thickness: initial; text-decoration-style: initial; text-decoration-color: initial; word-spacing: 0px;"><span data-mce-style="font-size: 10.5pt; font-family: 'Segoe UI',sans-serif; color: #212b36;">Rhinestone Tray<br data-mce-fragment="1"> <span data-mce-fragment="1">Wax Pencil</span></span></p>
<p style="margin: 0in; margin-bottom: .0001pt;"><span style="font-size: 10.5pt; font-family: 'Segoe UI',sans-serif; color: #212b36;" mce-data-marked="1">Sand paper</span></p>
<p style="margin: 0in; margin-bottom: .0001pt;"><span style="font-size: 10.5pt; font-family: 'Segoe UI',sans-serif; color: #212b36;">Alcohol Wipe<br> <span data-mce-fragment="1">Disposable Applicator</span></span></p>
<p style="margin: 0in; margin-bottom: .0001pt; font-variant-ligatures: normal; font-variant-caps: normal; orphans: 2; text-align: start; widows: 2; -webkit-text-stroke-width: 0px; text-decoration-thickness: initial; text-decoration-style: initial; text-decoration-color: initial; word-spacing: 0px;"><span data-mce-style="font-size: 10.5pt; font-family: 'Segoe UI',sans-serif; color: #212b36;" mce-data-marked="1">* Glue not included</span></p>
<p style="margin: 0in; margin-bottom: .0001pt; font-variant-ligatures: normal; font-variant-caps: normal; orphans: 2; text-align: start; widows: 2; -webkit-text-stroke-width: 0px; text-decoration-thickness: initial; text-decoration-style: initial; text-decoration-color: initial; word-spacing: 0px;"> </p>
<p>Steps to Bling your pen</p>
<ol>
<li>Disassemble pen and keep parts in a safe place</li>
<li>Paint barrel of pen to match color of rhinestone (optional)</li>
<li>Use nail file and sand barrel of pen. (Remove clip, some do some don’t)</li>
<li>Use alcohol wipe and wipe down surface, let air dry</li>
<li>Pour rhinestones in sorting tray</li>
<li>Apply a small amount of glue in a short line. Start at the top of the pen. (gemtac, Liquid fusion, B7000 all options not included in kit)</li>
<li>Place rhinestones around pen evenly spaced <strong>LET DRY</strong> before moving to next row. This is the foundation row so be sure it is straight</li>
<li>Continue with next row until you have filled entire pen.</li>
<li>Let Cure for 7 days</li>
<li>Re-assemble pen and enjoy your new Bling Pen!</li>
</ol>
Try blinging your very own rhinestone jewel pen with this amazing starter kit.
Bling Pen Kit Will Contain:
InkJoy Gel Pen (color may vary)
Rhinestones for Project
Rhinestone Tray
Wax Pencil
Sand paper
Alcohol Wipe
Disposable Applicator
* Glue not included
Steps to Bling your pen
- Disassemble pen and keep parts in a safe place
- Paint barrel of pen to match color of rhinestone (optional)
- Use nail file and sand barrel of pen. (Remove clip, some do some don’t)
- Use alcohol wipe and wipe down surface, let air dry
- Pour rhinestones in sorting tray
- Apply a small amount of glue in a short line. Start at the top of the pen. (gemtac, Liquid fusion, B7000 all options not included in kit)
- Place rhinestones around pen evenly spaced LET DRY before moving to next row. This is the foundation row so be sure it is straight
- Continue with next row until you have filled entire pen.
- Let Cure for 7 days
- Re-assemble pen and enjoy your new Bling Pen!
Try blinging your very own rhinestone jewel pen with this amazing starter kit. Bling Pen Kit Will Contain: InkJoy Gel Pen (color may vary) Rhinestones for Project Rhinestone Tray Wax Pencil Sand paper Alcohol Wipe Disposable Applicator * Glue not included Steps to Bling your pen Disassemble pen and keep parts in a safe place Paint barrel of pen to match color of rhinestone (optional) Use nail file and sand barrel of pen. (Remove clip, some do some don’t) Use alcohol wipe and wipe down surface, let air dry Pour rhinestones in sorting tray Apply a small amount of glue in a short line. Start at the top of the pen. (gemtac, Liquid fusion, B7000 all options not included in kit) Place rhinestones around pen evenly spaced LET DRY before moving to next row. This is the foundation row so be sure it is straight Continue with next row until you have filled entire pen. Let Cure for 7 days Re-assemble pen and enjoy your new Bling Pen!

Rhinestone Picker Tool Wax Pencil for Rhinestones diamond painting Dotting Pen 2pcs Dual-Ended Rhinestones Pen with 2 Extra Wax Tips and 1 Nail Art Tweezer for Nail Gems Crystals DIY Nail
Try blinging your very own rhinestone jewel pen with this amazing starter kit., Bling Pen Kit Will Contain:, InkJoy Gel Pen (color may vary),

DIY Bling Rhinestone Pen Kit

DIY Rhinestone Pen Kit – Graceful Rose Stones
Shop Nail Art Rhinestones Kit With Tweezers Pick-up Pen And Nail Glue, 24 Colors Flatback Round Nail Rhinestones Glitter Crystal Gem Rhinestone, DIY

Nail Art Rhinestones Kit With Tweezers Pick-up Pen And Nail Glue, 24 Colors Flatback Round Nail Rhinestones Glitter Crystal Gem Rhinestone, DIY Decora

Simple Steps on How to Bling Ink Joy Gel Pens using Honeycomb Pattern.

Ombre Rhinestone Pen Pattern File Download - Bling Your Things - Rhinestones
Try blinging your very own rhinestone Tumbler with this amazing kit. Create a simple or custom design with your favorite color rhinestones. The

DIY Bling Rhinestone Tumbler Kit
Parts List:, 01 and 02:, 1 x Box of Flat Bottom Rhinestones , 1 x Tweezers, 1 x Spot Drill Pen, 03:, 1 x Box of Flat Bottom Rhinestones , 1 x Box of
Fyeme Nail Art Rhinestones Kit DIY Nail Crystal Gems Kit 2400pcs AB Nail Rhinestones Multiple Shapes Flatback Nail Charms Beads Decoration with

Royal Bling DIY Beadable Pen Kit – Sassy Bead Shoppe
Try blinging your very own rhinestone jewel pen with this amazing starter kit., Bling Pen Kit Will Contain:, InkJoy Gel Pen (color may vary),
DIY Bling Rhinestone Pen Kit